GMI at ITMA 2023

ITMA 2023 comes to a close, as any trade fair we attended in the latest years, it has been an enriching experience in which we had the opportunity to discover different realities and to develop interesting ideas for the embroidery and garment world.

Thanks to anyone who came visit us, with the hope to meet again at ITMA 2027 – or even earlier: see you at the next fair!

Texprocess 2022

GMI at Texprocess 2022 fair

The Texprocess 2022 fair , held with Techtextil, is one of the most awaited events because it involves the various categories of the textile sector: design, furniture, clothing, up to finishing, logistics and IT.

Among the most important topics are digitization and the improvement of production efficiency.

In this dynamic and innovative framework, GMI has presented its latest solutions particularly dedicated to the world of embroidery

  • the new version of the well-known Stilista 3.3 embroidery software, enriched with beading and sequin functions
  • the vision system for embroidery machines, which has the ability to recognize appliqué outlines and automatically create the tack-down stitches or border
  • the laser cutting plotter with camera and advanced functions for recognizing contours to be cut, even with deformation
  • the 4.0 management system for embroidery factories, to control and automate the embroidery process

The balance of the fair was excellent, both in terms of quantity and quality of visitors.

After a three-year hiatus, we have noticed a sector in turmoil, companies with the need to know the latest developments and to see the innovations live.

Thanks to those who visited the GMI stand at Texprocess 2022 fair!

3D embroidery appliqué

3D embroidery appliqué

3D embroidery consists in giving volume to the embroidery to create a three-dimensional effect.

3D embroidery can be done with thread embroidery, using tear-off foam or wadding and following few simple but precise digitizing techniques. Often, a final finishing is required to be done by hand, to remove any parts of foam getting out from the thread. Hence, technique and experience are essential for optimal result.

If you want to replace the thread embroidery with applications, with a laser bridge the work is done quickly and you can create truly unique processes in less time!

Steps to 3D appliqué

The work can be done into two steps:

  1. stitch and cut the material that will give the 3D effect, usually foam or wadding
  2. sew and cut of the material being applied. For this, you can range from synthetic fabric, to natural fabric, micro-fiber, leather or eco-leather (i.e. in automotive sector).

When you draw the design, take into account the thickness of the filling material and how flexible the application material will be.

Here are some examples of 3D appliqué cut with the GMI laserbridge system, made with wadding, minimal thickness, and with 3mm foam.

Practical tips

When drawing the designs, we recommend starting keeping fairly large margin between the sewing and the cutting. Always make some tests on the machine, then you will know if you can reduce the distance until you achieve the desired effect.

The thickness of the foam affects the distance between the cutting line of the foam and the cutting line of the appliqué material.

In the end, choose whether the cut of the application must be covered with column stitches or left unfinished.

To receive information on both 3D thread embroidery and 3D embroidery with laser applications, contact us.

GMI at Viscom 2021 fair

GMI at Viscom 2021 fair

Viscom 2021 is the most important Internation fair of visual communication in Italy.

The exhibitions attract thousands of exhibitors operating in the embroidery, graphic,interior design, fashion, packaging and retails sectors.

GMI always presents innovative solutions for the embroidery sector and with laser cutting and engraving systems, which will not be lacking again this year.

GMI staff will welcome you to our stand, ready to offer all their experience in the sector, gained in over 30 years of company activity.

Among the GMI solutions, you will see the following systems in action:

  • Stilista 3.3 the new release of embroidery design software, improved and emnriched with new functions (beads, sequins, laser, rhinestones)
  • GMI Easy Cut: hot cutting device for single head embroidery machine
  • GMI CamStitch: the camera device for matching embroideries to printed images
  • GMI Plotter laser machines: laser cutting and engraving system

We are waiting for you at Hall 8, stand C29 from 30/09 to 02/10 and on the Viscom Digital portal from 3/10 to 5/10

To request free tickets click here.

Reverse appliqué

The reverse appliqué differs from the classic one which is sewn over the garment, because it appears from below the fabric or garment to be decorated.

With this technique you can get multiple effects and you can easily play with transparencies. You can create inlays of lace or of fabric of any texture.

How is the reverse embroidered appliqué created?

You have to think in the opposite way to the classic application, that is, first the application is fixed and cut and then the base garment / fabric is laid and cut.


Here is an example of a sequence of operations:

1- place the fabric that will appear in the inlay on the support material

2- sew the the inlay material (eg lace)

3- cut with the laser bridge

4- lay down the fabric or garment and make another boundary sew

5- cut the fabric inside the seam, taking care not to damage the underlying material.

You can apply this decorative technique to any fabric and leather material.

In the case of genuine leather or non-homogeneous materials, we advice to protect the underlying material. You can place a sheet of aluminum or aluminum coupled with paper, between the base material (negative application) and the overlying material to be cut.

For a cleaner tear, we recommend making on the protective state, a seam with a very short stitch and slightly larger than the cut that will be performed later.

After sewing and before laying the top fabric, the protective part outside the cut must be removed. After cutting the inlay, it will be very easy to remove the remaining protection, because it will have been “sawn” from the short embroidery stitches.

The technique is refined. It requires a minimum of care in finding the cutting parameters suitable for the materials to be cut.

GMI staff can give the necessary support to quickly obtain excellent results. Click here.

Abercrombie embroidery appliguè

Laser embroidery techniques: distressed applique

Distressed applique provides endless creative possibilities and allows you to create a look made very popular by names such as “Hollister” and “Aeropostale”.
Distressed applique products are often created so that they will become even more distressed over time and with washing.

How can you make distressed applique?

In the previous article we talked about applications with raw cut, the advantages in terms of saving time/embroidery stitches and the added value they bring to the decoration of garments and fabrics.
We have emphasized that when cutting synthetic materials, the edges are welded by the laser beam.
So we left with a question:
“What effect do I get if I use the raw cut technique with natural fabric applications, such as jersey or sweatshirt?”
Follow a few simple instructions, to obtain a very popular decoration: the vintage or distressed applique.

embroidery laser

Step-by step guide

Place a piece of cotton/jersey/fleece fabric on the garment, the embroidery machine stitches down the applique design, the laser bridge system cuts the outline of the applications, as you do for any laser embroidery process with raw cut.
Finally, eliminate the scrap fabric.
At this point, you can wash or wear the garment. The cut edges, not being welded, will fray, giving life to an effect that is very similar to the applied lettering found in the American Abercrombie garments.
You can combine different layers of appliqué or use the “reverse appliqué” technique as you can see in the next video. The possibilities are endless!

Don’t forget to test the quality of cut before proceeding with the production. Make cutting tests to find the proper cutting parameters, those that allow you to cut the upper fabric without affecting the lower one.

We recommend carrying out a cutting test on a test table, as our installation and service technicians teach in their courses.

On the latest version of the Stilista 3 laser driver software for the laser bridge, you can start from a set of pre-set parameters.
You can save optimal parameters as custom parameter sets for easy recall at a later time.
To find out more, you can contact our customer service experts or request personalized courses. Tel: + 0438556299 or click here.

laser appliqué

Laser embroidery techniques: the clean edge

One of the most important advantages of the “laser bridge” cutting system installed on embroidery machines is that the laser works in register with the embroidery machine. That is, the design will reproduced exactly as it was created.

This means that it is not necessary to:

  • create stitches that act as reference for laying the appliqué
  • cover the edges of the application with N-stitches to “hide” the inaccuracy of the hand-made cut and the reference stitches.

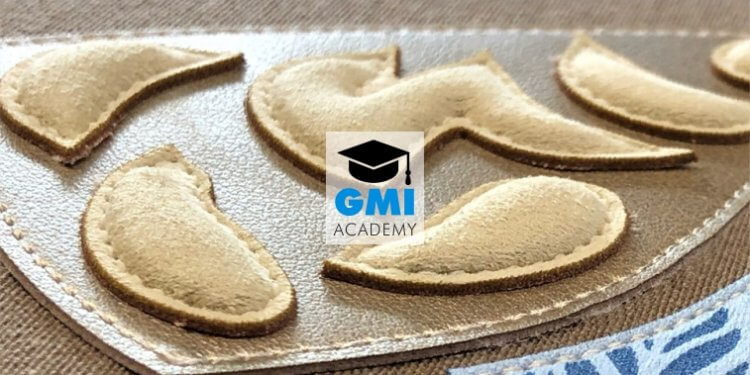
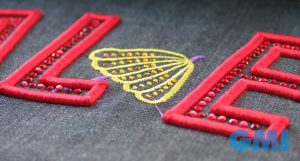
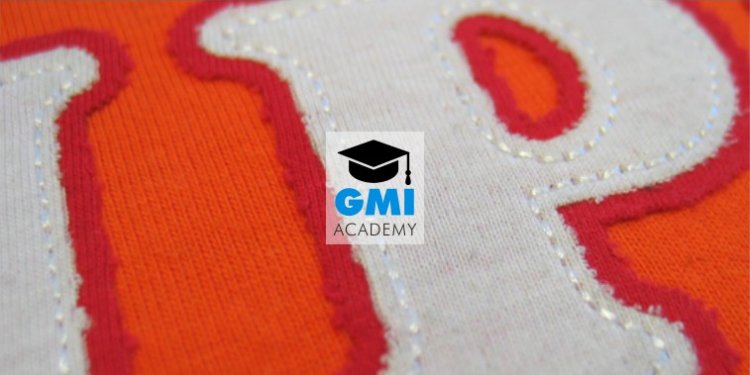
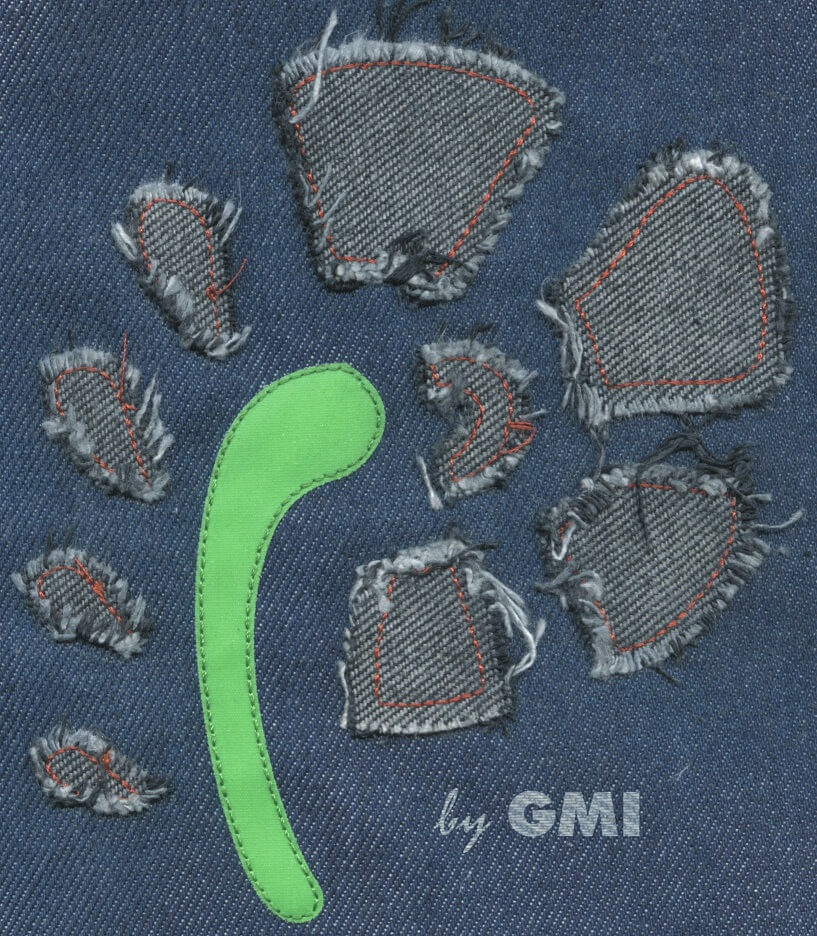
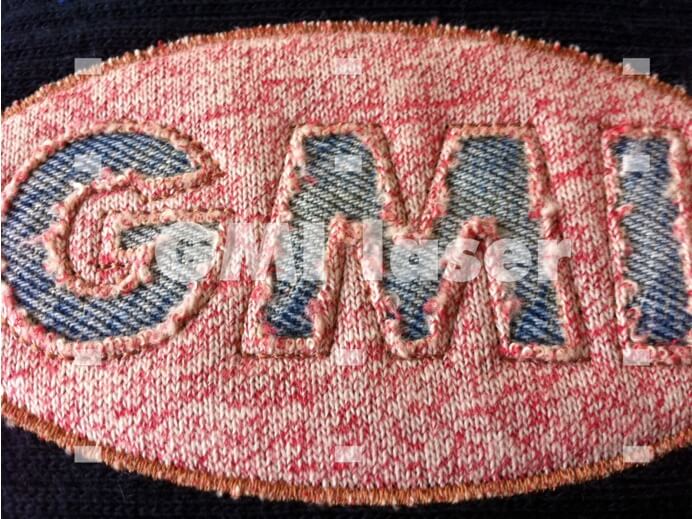
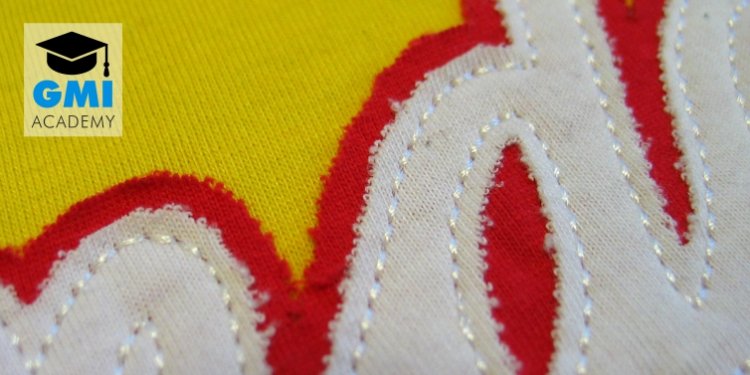
In the jargon of Italian embroiderers, the fact of leaving the edges of the appliqué visible, ie not covered by another thread, saw the birth of the term “clean cut”.

Clean laser cut embroidery appliqué give more competitive advantages:

  • save cover embroidery stitches , the time of the designer to create them and the working time of the embroidery machine
  • create highly profitable designs, because applications with clean cut edges, with articulated shapes or composed of many small pieces, are carried out at an industrial level only with a laser bridge system

Using other techniques such as cutting the appliqués out of the embroidery machine and following sewing in the machine, the above benefits are not achieved.

How to get quality embroidery appliqué

However, appliqué with clean cut edges have a downside: for best results, the embroidery stitches that fix the appliqué must be equidistant from the cut edge. This is achieved both by carefully taking care of the creation of the embroidery + laser file, and by choosing quality machinery. In addition, the machines and the laser bridge must be constantly in register.

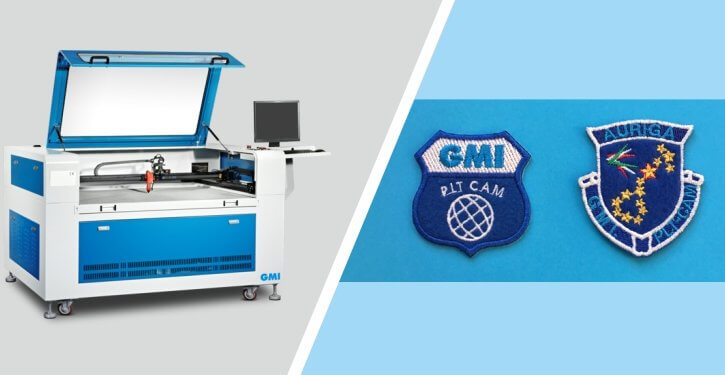
For this purpose, GMI has developed two systems to ensure optimal results:

  • LS1 automatic calibration systems, to be installed on embroidery machines
  • the Vision system for GMI Moda Laserbridge laser bridges. See this video.
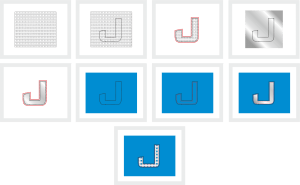
  • Stilista 3 laser driver PLUS software that control the laser machine. With this software the operatore can move single cuts on single heads, to get top precise cuts.

Further, to get optimal results, it is very important to choose the parameters of cut suitable for the type of process and material. To simplify the choice of cutting parameters, we have implemented in the laser control software, Stilista3, the pre-set parameters specific for Kiss-cutting. Start from this, it will be of great help!

In the next gallery you can see works that combine embroidery with “clean” cut appliqué, even with overlapping appliqué.

Which materials?

If you are not bound in the use of specific materials, we recommend investing some of your time to reflect on the type of design you will create and the materials you will use.

Ask your self these questions:

  • does the application material let the light through?
  • is the application material homogeneous?

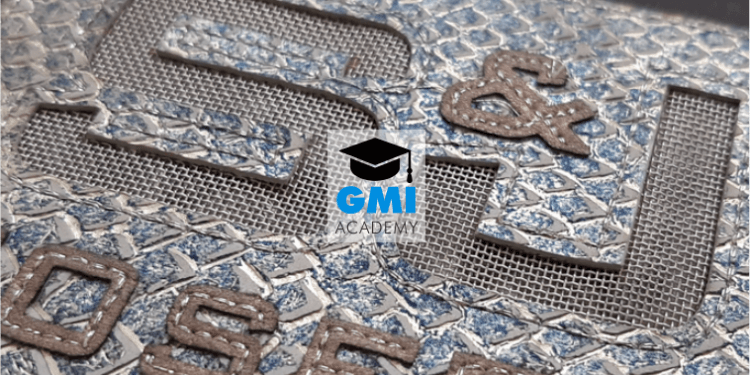
If the answer is yes to one or both questions, PROBABLY you will have to interpose a protective material, such as aluminium foil, between the base fabric and the application.

Why is protection needed in some cases? Because the laser beam is made of light which, at a certain concentration, heats the surface with which it comes into contact. If it encounters a homogeneous and resistant material, its energy is exhausted on that material. Otherwise, if it encounters less thick areas or areas with holes, its energy will affectt the underlying material.

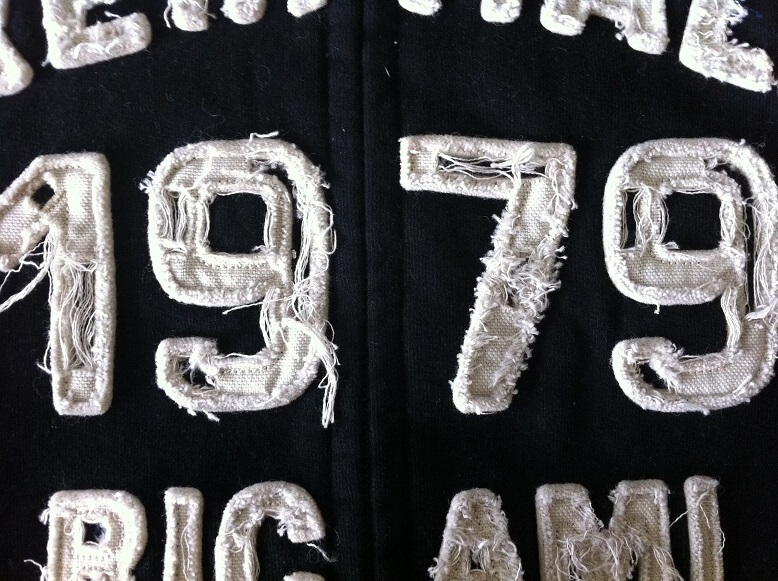
Some materials, such as cotton and wool, are not suitable for “clean cutting” because the edges cannot weld, as is the case with fabrics containing synthetic fibers.

Nevertheless, even with materials composed of cotton fibers you can create interesting effects, without covering the edges. We will talk about it in the next article. In order not to lose it, subscribe to our newsletter.

GMI Academy: embroidery laser decoration

New section: techniques (and tricks) of laser embroidery decoration

Today we inaugurate a new section that will illustrate the laser embroidery decoration techniques. In particular, we will focus on those that can be made with a laser bridge cutting system installed on embroidery machines.

Our aim is to make an overview of possible processes that can be carried out with a GMI laser bridge system. We will give you ideas to create unique embroideries with great added value. We will reveal some small “tricks” to get optimal results and we will show photos of works made with the GMI Moda Laserbridge system.

We will talk about different laser embroidery decoration techniques, like:

  • embroidered appliqué,
  • laser cutting
  • laser etching
  • photographic engraving
  • bleaching
  • embossing/debossing effects
  • laser cutting of natural leather and much more.

Each month, we will publish a new article that will introduce a laser embroidery technique with related photos or videos.

Beyond the information you can read in our articles, any time our customers can ask for the support to our team of technicians and experts.

Don’t miss any of the articles in this section and other news, subscribe now to our newsletter.

Finally, we leave you with a small gallery of laser embroidery processes taken from our archives. Some are now 20 years old but still amaze many embroiderers.

embroidery laser

In this regard, we would like to thank the embroiderers who from the beginning believed in the vision of Arrigo Battiston. He is the owner of GMI and creator, in 2000, of the first laser bridge cutting system for embroidery machines.

Laser plotter and applique

Laser plotter with camera: solutions for embroidery and print items – part1

Frequently, companies operating in the promowear market need to cut out patches, labels and other printed and / or embroidered items.

If the volume is large, hand cutting is not enough, therefore automatic cutting systems, such as laser plotters, must be used.

To make cuts in specific positions, for example at a precise distance from the edge of an embroidery, it is necessary to use a laser plotter with camera. The more sophisticated the machine and camera software, the better the result.


Let’s think of one of the most complex cases: the embroidered patches. These, by nature of the embroidery technique, will never be perfectly the same; the embroidered fabric is subjected to tensions given by the embroidery stitches. So in a pannel of patches, these will necessarily be slightly different from each other or even deformed.


Fortunately, the most sophisticated technology comes to our aid.

The camera control software of the GMI PLTCAM plotter has been designed to simplify and improve the cutting operations. It is particularly effective thanks to a set of controls and functions including:

1- function that automatically adjust and rotate the cut path without registration marks

2- function that automatically adjust the cut position on deformed patches, badges, labels, prints, etc.

3- function that cuts embroidered items, e.g. embroidered patches,  with edge column stitches in the same color as the base (if not affected by excessive deformation)


In the next video you can see some the functions described above:

https://youtu.be/VjtAflaLglQ

In the next article, we will talk about another important function, which makes the GMI PLTCAM even more performing.

GMI smart working for covid-19

GMI is operative and the technical support service is warranted

Dear Customers, Collaborators and Suppliers,

we inform you that, further the restrictions imposed by the Government of Italy to reduce to spread of Covid 19, we have adopted new measures to safeguard the health of personnell and partners.

In detail, we warranty the online support service, that can be demanded dialing the company phone number +39 0438 556299.

We have intensified the remote working methods, to give continuity to our services, so you can contact the sales and administrative staff at the e-mail addresses you already know or by filling out the request form available here: www.gmi.it/en/contact-us/

Confident that, scrupulously following the indications given by the Italian government and health personnel, we will overcome this emergency, we send our best wishes and greetings.

GMI srl

Top